
Create and Assign a Probe in RMM
- Open RMM. Navigate to the client that you need to create a new probe for.
- Copy the name of the machine that you wish to add a probe to.
- On the left panel, scroll down to the Administration tab. Click on “Probes.”
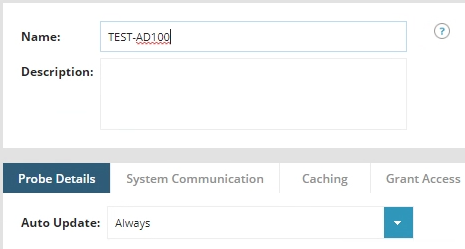
- Click on the blue button in the top left. Paste the machine name into the Name field.
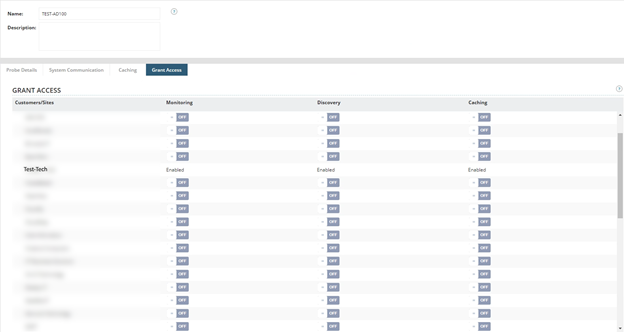
- Click the “Grant Access” tab. Scroll through and make sure that the row with the current client is “Enabled” straight across. All three should be set to “Enabled” by default, but it is best practice to ensure that they are.
- Default options for the other settings will suffice for normal operation. If you don’t need to change it, it is best to leave it as the default setting.
- When all settings have been confirmed, click the green save button in the bottom left corner. This should bring you back to the list of probes for the site.
- Click the arrow next to the blue “Key” button. Copy the long string of text labeled “Probe Activation Key” in the box that pops up underneath. NOTE: Sometimes the string of characters ends in two “==” so make sure you select the entire string by triple-clicking it.
- Navigate back to the list of all devices on the site by clicking “All Devices” under the View tab on the left-hand menu.
- Select the device you wish to add the probe to by checking the box to the left of its name.
- Click the blue button labeled “Add Task” in the options above. Select the option “Push Third Party Software.”
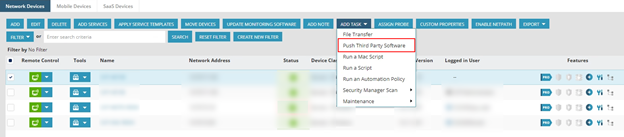
- Click the dropdown arrow for the “Repository Item” field. Select “N-Central Probe.”
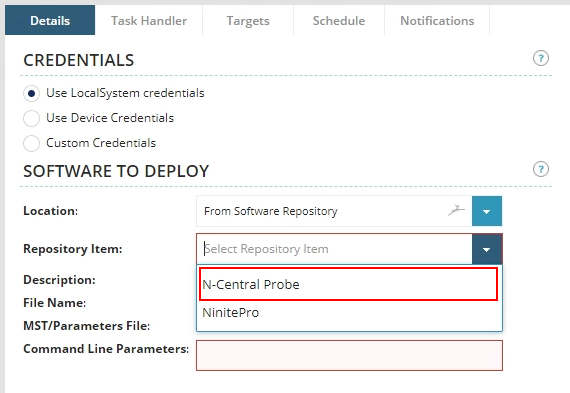
- In the “Command Line Parameters” field, scroll to the right and select the text “<AVKEYHERE>”
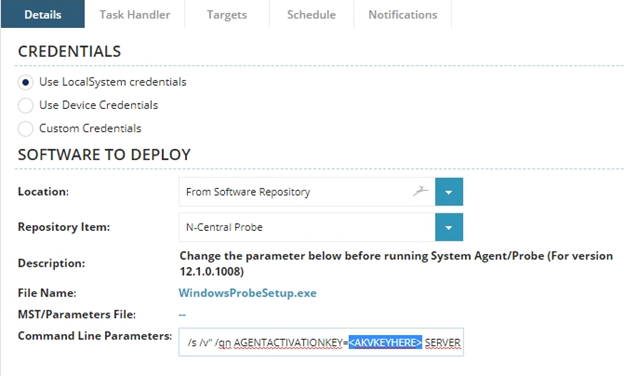
- IMPORTANT: Make sure you only select the words and the alligator brackets (< and >). Selecting the equals sign or the space after will cause the probe to fail.
- Paste the Probe Activation Key you copied. Hit the green save button in the bottom left. This will pull up a page showing the status of the probe activation. When the probe installation has been completed, navigate back to the list of all devices on the site.
- Select the devices which will rely on the probe, as well as the device with the probe, by checking the box to the left of their name.
- Click the blue button marked “Assign Probe” above.
- Under the column labeled “Monitoring Probe” select the new device using the dropdown menus. After assigning all the devices the new probe, click the green assign button in the bottom left of the pop-up.